Showing posts with label Customized. Show all posts

Wednesday, November 26, 2014

Simple Christmas Activity Calendar Banner-Style


This year's Christmas Activity Advent Calendar came together quickly. I was able to get this done in under an hour! 

This was a very simple project:

 1. cut even strips of Kraft Paper
  2. fold in half
3. stamp numbers and stars on the front
 4.write the activity of the day inside
  5. close with Washi tape

 I then pinned them onto some twine that will hang somewhere in the house where my son can take them down each day to read the activity. I am excited to try this more simple version out this year.

A lot of the activities are the same as last year's Activity Calendar, but I changed around a few - we have a couple of events this December and I wanted to try out some new activities. too.


1. Decorate the House and Make a Decoration
2. Write a Letter to Santa (we use the Mega Monkey Mash printable
3. Take a Family Photo
4. Order and Make Christmas Cards
5. String Lights Outside
6. Go Ice Skating
7. Visit Santa at the Company Christmas Party (or the mall)
8. Christmas Family Game Night
9. Make Presents (my son makes small things for his Aunts and Uncles. Last year he painted ornaments)
10. Watch a Christmas Movie
11. Make a Christmas Craft (this year I am thinking of some hand and foot print crafts)
12. Dinner Date
13. See the Light Show at our local farm 
14. Decorate the Tree
15. Bake Cookies
16. Check out the lights around the neighborhood, pick out our favorite house (maybe leave a prize at their door!) 
17. Another Christmas Movie Night
18. Write and Draw a new Christmas Story
19. Christmas Date in the City (we live near Philadelphia)
20. Decorate Gingerbread House
21. Winter Walk in the Park 
22. Make a New Ornament for the Tree
23. Wrap the Presents We Made
24. Cookies and Milk for Santa! And go to sleep early of course.


Do you have any fun Christmastime traditions? Please share! I am always looking for something different to try. 


Thursday, July 31, 2014

Happy Birthday, Harry Potter!

Did you know it is Harry Potter's Birthday today? My son very recently just saw some of the movies for the first time and has been obsessed ever since, and wants to be Harry for halloween this year. A few months ago, I posted a link to this tutorial which shows you how you can make wands. I had planned on trying it out but didn't get around to it until the kid showed an interest.

They were so easy! They're the perfect size and they are actually very sturdy. Each one is unique and the instructions were simple to follow. I wanted to share our wands that we made with the tutorial by trainsandtutus. We each made our own with dowels ($3.00 for a bag of 20), a glue stick, construction paper, hot glue gun, and paint. I have plenty more to make for my neice and nephews, too!


First we took a dowel and put glue all over the back of a piece of construction paper. We rolled the dowel tightly in the paper and snipped the ends.

Then I took a glue gun and made handles and random designs on the wands. I spun the stick while slowly pouring the glue out to make the handles and i liked how it dripped down the stick as I went.


They dry pretty quickly but I let it sit a few hours just in case. After that, I painted over everything in black acrylic paint. The glue was easy to paint.


 I almost wanted to keep it like that! It looked cool. But I had the metallic paint and wanted to give it a shot so we each painted our own wands.


I loved the tutorial and I love the wands so much I'm definitely making more. It was so simple and the result is unique, fun, and sturdy. Give it a try and share pictures!

Have a great Harry Potter's Birthday!

Monday, February 10, 2014

The Gift of Adventure


Today, I will be sharing with you a gift idea. Every year, my family has a Pollyanna exchange at Christmas time. This year to keep things interesting, we chose Pollyanna’s as couples. This gift was a wonderful Christmas present but could be given year-round at a Bridal Shower or to your partner this Valentine’s day!
The concept of the gift Is simple—I sat down and brainstormed 8 mini adventures my sister could go on with her fiancĂ© and 8 more adventures that she could do with her fiancĂ© and son. We had a spending limit of $100.00 a couple so there isn’t anything in here that is bank-breaking. In some cases, the gift pays for a small portion of the date, all of the date, or the date is something that is largely free. I made sure there was a variety of activities—funny adventures, physical challenges, food-related, artistic… something for everyone to enjoy.
I started the gift with the carrying case. This helped to set the restrictions and realities for what we could accomplish. I purchased an Extra Large IRIS Photo and Craft Keeper, 16 individual 4x6 cases within at Michael’s (with a coupon!!). I knew I needed to make each adventure fit in to a 4x6 photo case and I needed to have 16 in total. Maureen has a ton of printed pictures so I was confident that she would use the case even if she dismantled the adventures. I did choose options that you can keep doing over and over again (aside from the couple needing to purchase more items), so she could use the case for years to come as well.
Coming up with gifts that would fit into the case—that was the fun challenge for me! Take a look at the printable (link below) that I have included in this post for more information. I have the date descriptions, what I included in each case, and the case labels for each all ready for you to peruse -- you can make your own!

On a side note, my sister is an avid scrapbook enthusiast. I included Project Life cards, embellishments, and photo challenges in most if not all of her cases. If the person you are gifting this to is not a fan, it is best to leave that out and use the expense somewhere else. I recommend hounding your local Groupon and Living Social pages for deals. There were quite a few we looked at but passed up for other adventures. Do you know someone that wants to ride a Segway on an obstacle course or get family photos taken at Picture People?

Tuesday, February 4, 2014

Lego Themed Birthday Party Ideas


Caitlin here. I am the sister who is obsessed with a good themed party. I always try to gear the theme to something that is relevant to the star of the party! Since it is Lego Week, I wanted to compile some fabulous ideas for a Lego Themed Birthday Party!

First, you are going to need invitations. Mo made some really cute handmade Lego Cards here. Making your own invitations is very easy to do. You can focus on the age the child is turning here as well.

Decorations:

Primary Colored balloons would work great here. Cheap and easy! 

You can make your own Lego Pinata and fill it with Lego bricks, Lego brick shaped candy, Lego "guys", M&Ms (which I have seen them referenced as Lego Man Poop).

Plates can be Yellow with faces drawn on them to look like a Lego Man head. (square plates would work best here).

For a utensil holder, you can build that out of bricks yourself!

We just visited our local Lego store and received a free Lego Movie poster! Lucky us! I would use that in my decor. You can also make signs using a Lego font which you can get free at www.typenow.net.

Food:

Main dish can be a classic party food...PIZZA! Make it square shaped pizza with pepperoni so they look like the Lego bricks! My little brother actually had a little girl attend his Ninja Turtle party where we served pizza. She did not like pizza. My mother ended up making her a peanut butter and jelly sandwich. In case that happens to you, you can simply cut the sandwich into rectangles and add circle shapes made out of the bread on top. Problem solved :)

The cake can be made in so many creative and different ways. One I would personally try because of my skill level would be making cupcakes and placing a chocolate molded yellow Lego guy on top. Another route I would go is making rectangle cake (like a pound cake shape) and either placing the upside down cupcakes or large marshmallows on top. Then, cover with icing!

Lastly, we made yummy Lego brick gummies the other day. I would totally have them out for kids to snack on or place in their goodie bags! Lego cookies are also fun and easy to make!

Check out more Lego Food ideas later this week on our blog.

Games:

You can have several stations set up for the kiddies to play throughout the day. Depending on age or skill level, there are so many different games you can try!

Lego Scavenger hunt:
You can describe the different Lego pieces (or provide a picture) for them to find. These Legos can be hidden or in plain site. First one with all the Lego pieces listed wins!

Lego Bingo:
You can make a printable with different Lego pieces on a Bingo board with cards to draw. First one to complete a row wins!

I did a review on Creationary, the Lego game, last week. You can of course play this game at your next Lego party! It is fun for all ages (7 and up is recommended)

You can make Lego Man crayons like we did here and provide a printable coloring page for the kids to color and take home.

Set up a station with assorted Lego bricks to build your own picture frame (take the child's photo if you have a photo printer) and send them home with a cute party favor!

You can also have them make a Lego magnet. Just glue a magnet to the back of their creations!

Since I am into making jewelry ...I would set up a station with easy to use materials for kids to create their own bracelets or necklaces!

You can have the kids sit in a circle. First child rolls a dice. Whatever number they roll, they add bricks to a creation. Than the next person rolls and places those bricks on the other person's bricks and so on. You will end up with some silly creations.

Since my 4 year old nephew is really into building things out of cardboard boxes right now (there is seriously the biggest spaceship in the living room right now as I speak), you can get different sized boxes and cover with primary paper. Make them look like Lego bricks. They can build a fort with the bricks or just simple towers! Kids love knocking those towers down!

Party Favors:

For the party bags, you can get cheap primary colored paper bags and cut out little circles to paste on them. They look like Lego bricks! Fill them with Lego Mini-builds, Lego cookies, gummies, Lego Men, Lego Crayons, Soap, Chocolates...whatever your budget allows! Just like Lego, the possibilities are endless!

DON'T FORGET the Thank You notes!! Teaching my kids manners and gratitude will always matter most. You can make your Thank yous to match your invitations easily!

My son and niece are turning two this March. I am seriously considering a Duplo themed party for them (since they are still too little for Lego). Hope this inspired you as well!

Friday, January 31, 2014

Lego Week- Lego Building Challenge Game

I love a challenge. When I was on a cruise last year, there was a Lego Building Challenge activity that we participated in, and I thought it was so fun! 


I decided I wanted to make a Lego Challenge Game of my own for my son and his cousins. First, I collected the scraps of Lego packaging that I saved. I know, I'm silly, but I love to cut out the pieces of packaging I think I can use on a project. I do it with every single super hero tag off of the clothes I buy. Obviously - it's buy a shirt get an embellishment free!


I used a tag punch to punch out some of that yellow cardboard, which is actually a yellow Lego background. I then cut each red square logo and inked the edges. I found some cute kraft envelopes in my stash and decided I'd use those to hold the challenges.


Next, I put red numbers on the yellow tags, punched small holes in the top of the yellow tags, and put twine through the holes. I attached the tags to the yellow journal cards using red washi tape. 


Lastly. I added some challenges. I thought that the kids could go through each challenge and whoever successfully completes each one wins. They can also roll a dice and just complete the one challenge that matches the number, too! The best part about the washi tape is that it is removable and you can make new journal cards with new challenges. 


The challenges in my game are make a garden, build something you find in the city, make an animal, build a house, build a car, train, or airplane, and make a boat. 

Lucky for you, I have created a Free Printable for you to make one of your own!

I hope you enjoyed! If you're looking for other fun Lego games to play, check out Creationary, this printable lego board game, DIY Lego Land Game, Lego Tic Tac Toe, and Lego Hangman

Wednesday, January 29, 2014

Lego Jewelry!!!

I was inspired to make Lego Jewelry since it is Lego Week!! We are celebrating the upcoming Lego movie this week and it has so far been loads of fun.


I was more of a Barbie girl than one who played with Lego growing up. I am totally not the best builder. In fact, I would have to say my son is much better at it than I. Making jewelry is my passion and it was super easy for me to come up with Lego jewelry designs! I hope you like them!


We sell some items on Etsy ourselves. Currently, we do not sell Lego Jewelry, but there are many people who do. For our local fans, we will be selling Lego Jewelry at craft fairs!
Our first craft fair will be at Holy Cross in Springfield, PA March 1st! If you live in the area, be sure to come and check us out!

Here is a little of what I have been working on. Hopefully, it gets you inspired!!


Thursday, January 23, 2014

Super Hero Tower Part 2- Dollhouse Furniture

Here is the latest on the Super Hero Tower that is in progress. I have successfully found wooden furniture at my local thrift stores, craft stores, and Tuesday Morning store for decent prices. I wanted to be able to paint and put stickers on the furniture so I didn't want any plastic or girly things. Here are some of the things I've done so far!


I painted all of the furniture in colors I thought reminded me of different heroes.


I used mod podge over stickers on some of the furniture.


There happened to be little slots on this book shelf, allowing me to put some plywood in to look like a door. I covered it in chalkboard paint so the kids can decorate the door and add windows. It's easily removable and works on the bottom two "floors" of the tower.


Why yes, that is Cyclops in the mirror of that vanity. 


And Thor in the mirror in the bathroom, with a Captain America bathtub and something from Mr. Freeze's Imaginext set. 


The BatCave isn't quite finished yet. I'm planning to attach fabric to the front to hide the cars underneath using Velcro. 


Here's a peek at what it looks like so far, without all of the Super Heroes and accessories from the play sets.


I hope you are enjoying it so far! I will have a final post up when I finish my last touches. 


Wednesday, January 22, 2014

DIY Eclectic Alphabet Wall Art: Part 1


Let me have an honest moment with you, readers. I have lived in my house for over 5 years now and though I love DIY and art, there is not a single nail in my walls. It is a point of frustration for me that I am determined to remedy soon (and more on that later!).

When I was pregnant with my daughter (2 years ago), I was inspired by all of these lovely images I found all over the internet of eclectic alphabets hung in children’s rooms. My partner is not a fan of eclectic style but to my shock and amazement, he told me it was a great idea when I said I wanted to make letters to coordinate with the baby’s room. Honestly, I think that deep down he thought it would be a project that I would never finish. Well, joke is on him now! I applied my last coat of purple to the final letter last week and hung them all on the walls of my daughter’s room yesterday!

There is some great variety here so take a look! I would love to tell you how I made them—it might inspire you to create a few of your own as well. You don’t have to do the whole alphabet. Consider doing your street name in the front entrance, your family name in your living room, your child’s name in their bedroom, or your favorite creative word in your craft space!


A: Picked this one up at Home Goods. It was originally silver and designed to sit on a shelf. A healthy coating of green and the latticework of the metal shines.


B: I bought the letter and the canvas at Michael’s. The canvas is a part of a 10 pack of 8x10 value canvases. I wrote the uppercase B in pencil lightly and free hand then filled it in with purple acrylic paint. The lower case B was white and I spray painted it green.


C: My mom made this one! First, she used Spellbinder's to cut the flowers out of paper. Taking chalks, she colored the petals and adds a pollen accent on the middle with a Copic Marker. The flowers are hand painted with stickles on the inside for the touch of glitter every little girl needs.


D: This is a cardboard letter I got in the clearance section of Michaels—25 cents! I painted the letter purple then took purple glow-in-the-dark puffy paint and drew the scrolling design by hand. This letter was inspired by this pin!


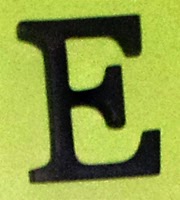
E : This is a pretty heavy pre-made letter. I bought it at Marshall’s. It’s a dark brown that I did not alter in any way. 


F: This one was fun to do! I started with two different weights of jewelry wire, a print out of the letter “F” in a font that I liked, and a can of purple spray paint. Bend the heavier weight wire to trace the outline of the letter that you have printed. Overlap the ends and twist off. Mine ends in the straight, flat area of the top of the F so that it is in a strong place for support. Next, twist and wrap the thin wire in and around the letter outline. I was going for a "scribbled" kind of look but you can certainly wrap in a more uniform pattern. This step, I used several lengths of wire so that the wrapping was easier. Just do your best to tuck in any sharp ends. Next, spray paint the letter whatever color you desire. This letter was inspired by the string art you see all over the internet these days... just with a different nod to it!


More letters (and better pictures, I swear) to come! Stay tuned...


Link to Part 4 (Letters T to Z)Link to Part 5 (Arranging and Hanging)
 

Friday, January 17, 2014

Home Depot Do-It-Herself: Class Review


Last night, I went to my first Do-It-Herself class at my local Home Depot. The class was to teach us the skills we would need to make a storage bench/table similar to the one on Ana White's website.


The class was taught by a member of the Home Depot staff, Joe. Joe is a professional cabinet and stair maker in the area who works at HD for "gas money" (and I am thinking an employee discount).

The class started promptly at 6:30. There were 3 students (which, for a Thursday night, isn't that surprising). Joe asked us our skill level and let us steer a lot of the class time. We chose which of the different possible joins we would use in the construction as well as how to modify the molding and lid. The plans had a lid with a hinge and we changed it up to a totally removable lid. We were treated to coffee, donuts, and our very own pair of safety goggles-- safety first! Protect those eyes!

The instructor was engaging, sharing personal and professional stories with us as we went along learning. I can tell you-- this wasn't just a commercial for power tools! I learned how to DIY and use some materials I already had, use alternatives in construction... it was a great class!

At the end of the class, the instructor asked if we wanted to take home the project with us-- free! I was told that they usually mock up a few different examples of the same project with variations and the class members participate in creating an additional creation in class. At the end of the class, they give away all of the examples!  Now, to paint or to stain the beautiful maple container?

I would take another class, no doubt. In fact, I have already signed up for the next one! We will be making a tiled mirror. That sounds fun!

Wednesday, January 1, 2014

DIY Board Game

This Christmas, my family decided to change up our Pollyanna to make it a couples exchange. (When you include Mom & Dad, that's 14 adults and six kids- Pollyanna is necessary!)  Each couple had to give gifts to another couple. We could give them things that were on their wish list or get creative and send them on their dream date. We had very loose guidelines this year. With a tight budget I knew I'd be getting my Pollyanna some gift cards and some gifts that I was going to make myself. Some of the things I made them included an ornament with their names, a scrapbook kit, a date jar, and just printing a family picture out and framing it for them. I also had an idea to recreate one of my favorite board games for them with a personal touch. 
The game my fiance and I decided on was Clue. I've always loved the mystery behind the game! It also reminds me of the game we play before we exchange gifts, guessing who has us. To start, I searched some stores in my area to find the game to recreate. All I could find were hard-to-work-with, newer versions of the game that weren't quite what I was envisioning. I wanted the 80's and 90's version I grew up with.  I went to Etsy and found PaperCreationsbyDeb, who sells a ton of vintage game boards and pieces at great prices. There are a few more of the clue boards on there, too! Since I was only getting the board, I decided I should pick up some game pieces, too. I found these great wooden babies on Etsy by UrbanHomesteaders. I then decided I'd make or find all of the other parts of the game in time for Christmas. 


This version of Clue was made with the thought that each room would be a house owned by one of the families, the characters would be the 6 kids, and the "weapons" would be anything a child could potentially get in a lot of trouble with. I made everyone take a picture of their families, most opted to do it in front of their Christmas Tree. I had two empty spaces left over, so I put a school and a store there, figuring those were the other two places you often take your children. 


The "weapons" were all buttons and charms I found in my mother's stash. I used crayons, a ball, paint, a phone, scissors, and money. You could guess my son getting in trouble with the paint at Nana's house and be completely accurate, by the way. I also found some dice left over from older games. 


To make the cards, I had to decide how big I wanted them to be. I found an envelope that was about 4x5.5 inches in my scrapbook stash. Since you need an envelope to play the game, I used that to make my decision about the sizing of the cards. Each card is about 3.5x5. I found pictures of all the kids with their guiltiest faces and put a line of color and their name at the top. I printed them all out on one sheet of photo matte paper or card stock. I then did the same for all of the houses and the "weapons". For the backs of the cards, I made them all say what category they were and printed them on separate sheets. After I cut everything, I laminated the fronts and backs together.  

I made the clue sheets by creating a grid in excel, including each category and each possibility. I put three across a page and printed it landscape. I then printed several copies so the game could be played many times. 


The board was the trickiest part. I first cut out black card stock for each room and covered most of it, leaving the doors visible so the player knows where to enter  the house. I used my Canon Selphy CP900 printer and the photo app Pic Frame to print out small pictures of all of the family pictures and used adhesive to stick them to the board. I also had to make new blocks for all of the characters and secret passageways. 


After everything was stuck down, I used modpodge to make sure it stayed down. Note- really old modpodge may smudge printed ink. Who knew? The newer bottle I used was fine. The older bottle could possibly be older than me. After that dried, I made the decision to put contact paper over top but it hasn't been staying on very well so we might just take that off. If you are an expert with clear contact paper it could work for you.


And there you have it! A customized board game made with love. Time for a Family Game Night!