Showing posts with label Fast Project. Show all posts

Tuesday, April 1, 2014

Handmade Captain America Greeting Cards

My Fiance's birthday is this weekend and I'm just in luck that Captain America Winter Soldier comes out this weekend, too! He loves superheroes even more than I do so the birthday date is all planned. 


My son and I worked together on the cards, using circle punches and star punches to make the iconic shield. 


I haven't always loved making my own cards, but when they are as simple as this it is great and you save yourself $4.00. 

The second card I made was also simple and fast. I just cut different sized rectangles with my scraps from the shield and used another star. It looks a little like the old school Captain America costume. 


If you have never tried card making before, I suggest you give it a go with simple shapes like these ones. 


Thursday, February 13, 2014

Kids Valentine Crafts

I love getting the kids involved in Valentine's Day Crafts. Here is one that I did with my son two years ago. It was so easy for a 2 year old to do. I traced his hand and arm on brown card stock and cut it out. Then i used heart punches in two sizes to cut out light pink and hot pink hearts. I put sticker tabs on the backs of all the hearts and let him put them wherever he wanted. 


He went for a falling leaves style - so cute. I put green card stock on the bottom of the page for the grass and he picked out a picture he liked so I could put it on the page. 


This year we took an embroidery frame in the shape of a heart, used some thread to attach paper to it, and he and I both put our thumb prints on the paper to make a Love Bug. He added the googly eyes, the bow, and drew the legs. I wrote the Love Bug 2014. I love making a project together with him.


Another craft we did together was for preschool. It was this heart that was supposed to have our family in it. He picked out the papers from a 6x6 paper pad, I cut them and he told me where they go. Then he picked out the family sticker and hearts and put the glue on everything. I did the stickers with our names. 


Sunday, February 9, 2014

Handmade Valentine's Day Cards - Fast and Easy


I have accumulated quite a few of these journaling cards that are designed for pocket pages, such as Project Life. They generally come in a 3x4 or 4x6 size. A lot of them have cute titles on one side and space for journaling on the back. I decided to use a few for my Valentine's Day cards this year. It was so easy and each card came together in five minutes or less! 


I used different sizes for the card bases and started with the 3x4 cards I knew I wanted to use. For most of the cards I either matted the card with more patterned paper or ran a border strip across the middle. I also used some stamping one the "Kissing Booth" card

. I highly recommend grabbing a pack of these cards- Michael's has some called Pocket Pages and they've also started carrying some Project Life and Snap! Then you can use your stickers, paper, and embellishments to make each card unique. I try not to think too hard on each one. Sometimes the simplest cards look the best to me! Hope this helps give you some ideas on fast and easy Valentine's Day Cards.

Monday, February 3, 2014

Lego Week: Fun Lego Photos


I am having fun documenting Lego Week and making sure I get a lot of photos so I can scrapbook them. 


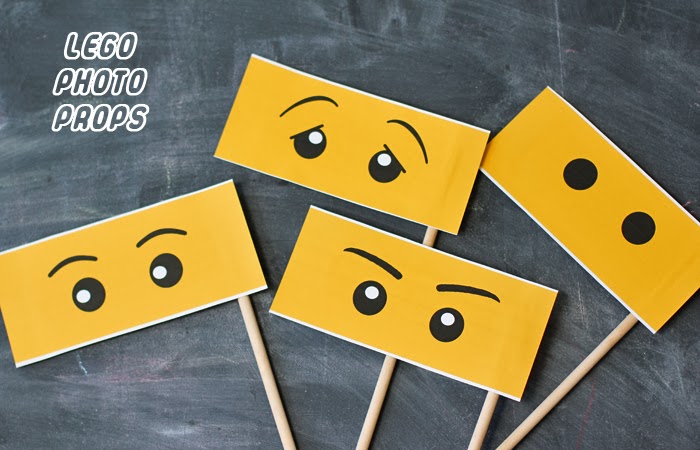
I wanted to make some props for fun and made this Lego head using simple rounded rectangles:


I printed a few and let my son color faces. He came up with some pretty cool monsters! Then we attached them to colored Popsicle sticks with some glue dots.


Here are some links of amazing Lego Photos I've seen around the internet:


Warm Hot Chocolate has some printable Lego eyes so you can still see who's under that face. Adorable!


No Bad Days talks about making this adorable cardboard cutout for pictures.


Free Stylin' talks about these super cool Lego bricks on the wall, bet you could make an entire back drop out of those!


Stop by your local movie theater and see if they have one of these cutouts. We took quite a few pictures here.

Do you have any cool Lego photography ideas? Please share in the comments below. 


Saturday, February 1, 2014

Lego Week- DIY Lego Storage


I hope everyone is enjoying Lego Week. My exciting announcement is that there is MORE next week! That's right, another week of Lego Inspired crafts! 

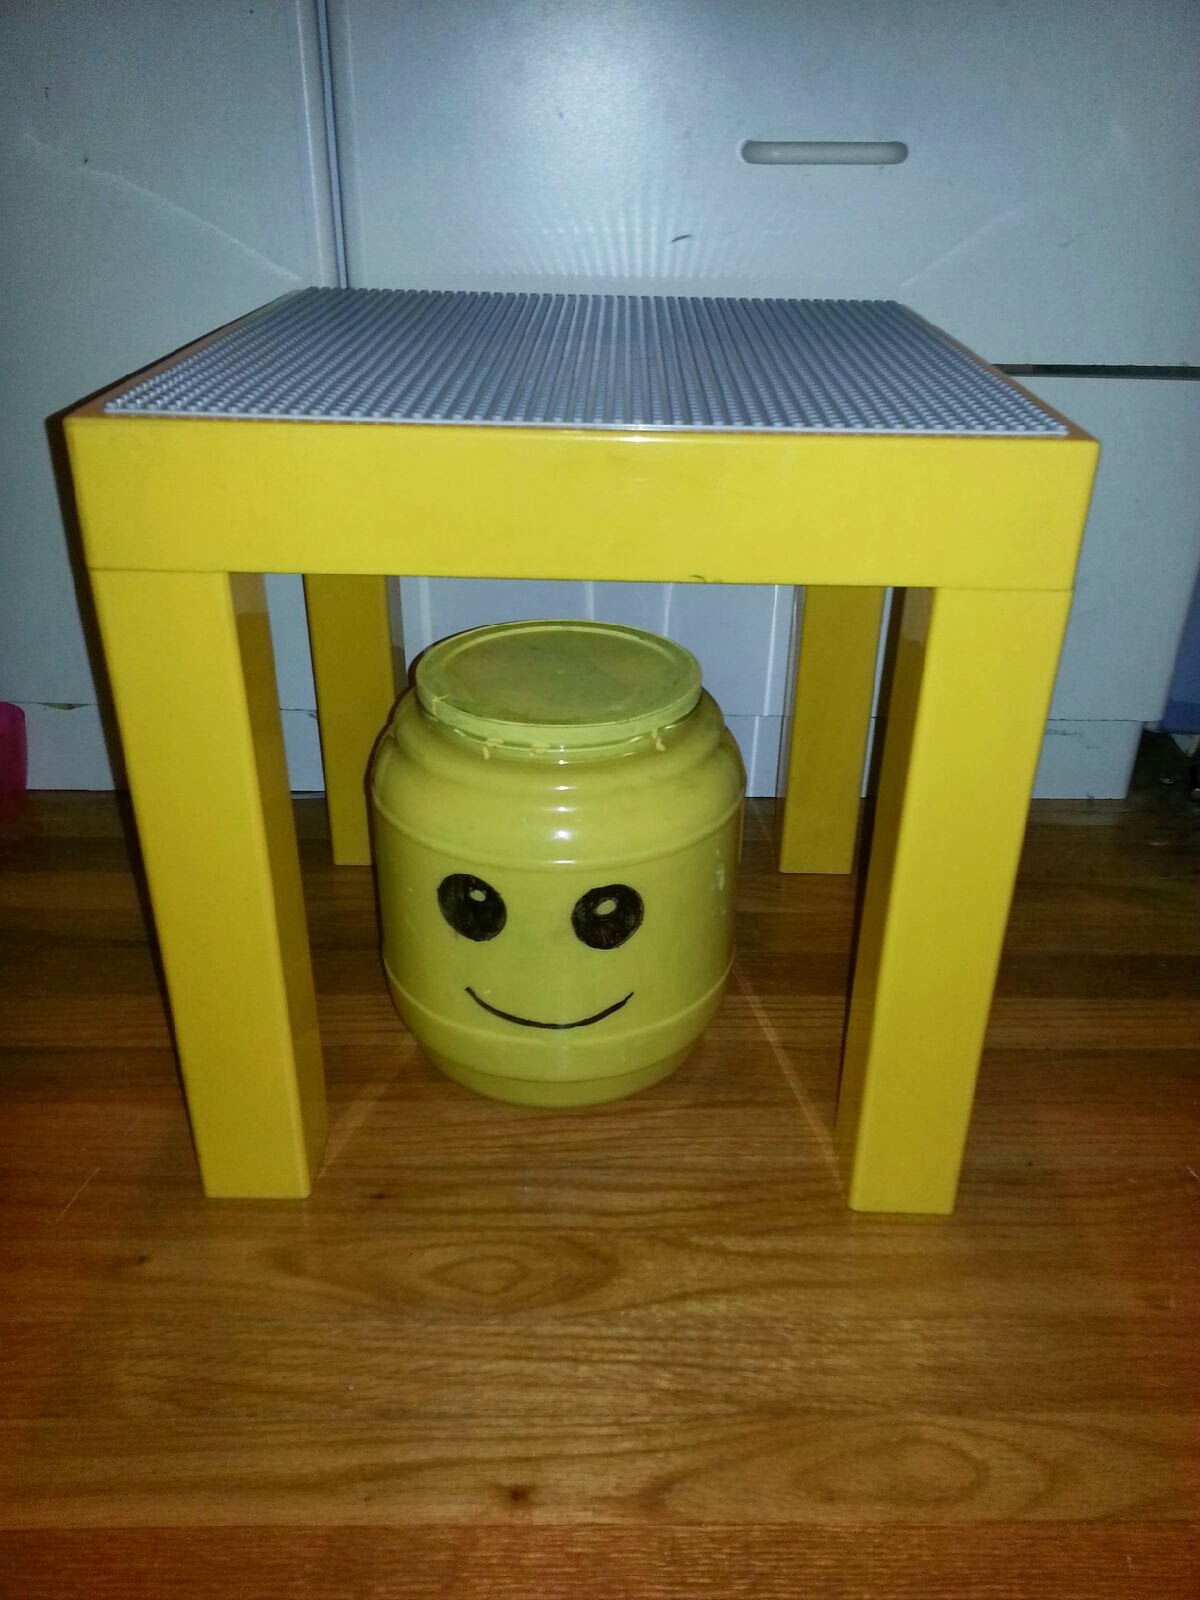
This Lego Head Jar was incredibly easy. It is my alternative to this one that sells for around $20.00 in most stores (unless you can find a local Marshall's where it's on clearance!). My DIY Lego Storage is a bit larger, made from one of those plastic containers that pretzels and cheese balls come in. I saw some great jars on pinterest and was excited to try it myself. 

First, I used acrylic paint on the inside of the jar. I started by letting it drip from the top rim down. then I painted all around the inside. I put two or three coats of paint on, letting it dry in between each coat. I then used a sharpie marker to make the face on the front. Simple as that! 


It fits nicely under my DIY Lego Table, too! You can try with any size jar you like. Enjoy!


Tuesday, November 19, 2013

Free Printable - Letter to Santa

My daughter will be one and a half this Christmas. Last year, we had a fun time playing with the balls on the Christmas tree and ripping paper, but she didn't have a clear understanding of the holiday and all it entails.

Now, I am not going to suggest she understands about elves, reindeer, or giving but she certainly knows who Santa is-- she picked out his picture in a magazine and we didn't even teach her that association!

Being the aunt of many nephews and a mother, one of the most popular questions I have come across over the past two weeks is when Lorelai's Christmas List for Santa will be ready. For fun, I made a free printable to share with all of you so you can also get your child's list together and sent out in the mail to the North Pole.

https://drive.google.com/file/d/0B-CfETec_i_scGw0TmNoNmFGRUk/edit?usp=sharing
Click the image above or you can go to the link here to download your own Letter to Santa.

I made sure to include a note about donating to another child in need this holiday season so that I could start instilling that idea in Lorelai at a young age. Every year, I will make sure she participates in Christmas Giving (as well as giving throughout the year). It is something that my family taught me and certainly something that we will be carrying on as a family together.

I love holiday traditions! What is your favorite? Are you going to start a new one this year?

Thursday, November 14, 2013

Thor Week- Even More Thor Inspired Crafts

Hello! Mo here with another Thor Inspired post. Hope everyone is having a great Thursday! (Thorsday?) Anyway, today I wanted to share some additional crafts I did this week that were fairly quick and lots of fun!

First, I searched the web and found this free Thor Cross stitch pattern! 


You can find the PDF download of this pattern by avozika on this website. Since I haven't cross stitched in years, I think beginners could definitely do it. So if you ever wanted to try cross stitching, now is the time! Here is what it looks like completed:


 I stitched this entire pattern while sitting in the dentist's waiting room and watching my favorite prime time TV shows this week. I like to multitask. I still need to put it in a frame and I'm considering stitching a quote underneath just for fun. 

Also this week I made this picture frame: 


I used a wooden frame from my local craft store and some old comic books I found in a thrift store. This was a "teens +" version of Thor. I cut up some interesting parts of the comic book and rearranged them on the picture frame until I liked what I saw. 

Then I got the Mod Podge out! 


This stuff is great. I was able to glue everything down with it. Then, using a paint sponge brush, I put a thin layer of the mod podge over the top and took care along the edges. I put a couple layers on and let it dry. Then I painted the sides and back of the frame black with some help from my son. We like to paint together.

After the paint was dry I sprayed some acrylic sealer on top to make sure everything stays put. The most time consuming part of this project was waiting for everything to dry, but honestly the paint and mod podge dried within minutes. This one is definitely an easy and fast project and I still have plenty of pages from the comic book left to make another!

Thanks for reading, now get crafting!